


Terraforming is reshaping the ground of a world so it reads as natural land: hills, valleys, cliffs, rivers, coasts. It is the difference between a build that sits on a bumpy lawn and one that sits in a landscape. Most of the craft is not in any tool. It is in a handful of rules about shape, erosion and colour, and this guide covers them first, then the ways to apply them. It was checked on 3 November 2026.
What you end up with
- A checklist for terrain that looks natural: landform, scale, erosion, rivers and block painting.
- The WorldEdit, FastAsyncWorldEdit and Axiom features that do the work, and where each stops.
- A schematic or a set of region files from the BlockLab terrain generator, and how to bring it into a world.
Start with one landform
Decide what the ground is before you place a block of detail: a ridge line, a valley between two ridges, a plateau with an edge, a basin with a lake. Natural terrain has one dominant shape and a few smaller ones that serve it. Lumpy noise everywhere is the usual failure: every hill the same height, every slope the same angle.
- Check the silhouette from far away. Fly back until the area is a few hundred blocks wide and look at the outline against the sky. A readable ridge or a clear gap tells you the landform works. If the outline is a wiggly line of the same amplitude, it does not.
- Think in the player's scale. The player is two blocks tall. A hill 15 blocks high is a bump, a mountain needs well over 100, and the world is 384 blocks tall in total (from y -64 to y 319). Plan the height budget before you start, and keep the valleys low enough that the peaks mean something.
- Mix steep with flat. A cliff above a gentle foot, a flat valley floor between two slopes, a plateau with a hard edge. Flat ground is what makes slopes visible.
- Break symmetry. Avoid cones and circular islands. Stretch features along one direction, as real ranges and valleys are.
Erosion
Three processes explain most of what natural ground looks like, and you can fake each one by hand.
- Water carves gullies. Rain collects and runs straight down the slope, cutting narrow channels that start near the ridge and widen as they descend. At the foot, the material it carried spreads out in a fan. Cut channels downhill with a narrow brush, then pile a shallow fan where each one meets flat ground.
- Slopes settle. Loose material rests at a limited angle, so below a cliff you find an apron of scree that is gentler than the cliff and steeper than the valley floor. Smooth the base of every cliff into a ramp of rubble.
- Rock shows on steep faces. Soil cannot hold on a steep slope, so the rock beneath appears, often in horizontal bands. Soil and grass collect on the flats and gentle slopes.
Do the shaping before the painting. Colour hides a weak shape for a minute and then makes it worse.
Rivers
A believable river is a line with a logic. It has one source and one mouth, the source is higher than the mouth, and the water never climbs. It is narrow and quick on a slope, and it widens and starts to meander once the ground flattens. It sits at the bottom of the valley, in the lowest line of the terrain, and its bed is lower than its banks along the whole course. Tributaries join pointing downstream, in a Y, and never cross.
Minecraft adds one constraint: water in a row of blocks sits at one level. On a slope the river drops in steps, with a short drop or a waterfall between flat stretches, and the banks have to rise with each step. Plan those steps first, or the river will look like a ditch filled with water.
Paint by slope and height
Pick blocks from two numbers: how steep the ground is, and how high it is.
- Flat and gentle ground: grass, with patches of coarse dirt and podzol.
- Transitions (grass thinning into rock): coarse dirt, gravel, a little moss.
- Steep faces: stone and andesite, with a darker block (tuff or deepslate) in the cracks.
- Peaks: snow and calcite above a height, but only where the ground is not too steep, because snow slides off cliffs.
- Low ground: sand and gravel along water, clay or mud in the shallows.
The part people skip is the edge between two zones. A hard line where grass stops and stone starts reads as a stencil. Mix two or three blocks with weights across the transition, use patches instead of bands, and let one block fade into the next over a few blocks. In the Gradient tool you can find the blocks that sit between two colours.
Ways to do it
By hand is slow, but you see every block and nothing is generic. Keep it for the last 10 percent: a tree root, a boulder, the one gully next to your build. For the rest, two tool families do the heavy lifting.
WorldEdit and FastAsyncWorldEdit
- Brushes for
raise,lower,smooth,gravityanddeform, and aheightmapbrush that raises or lowers terrain from an image. - Mask-limited smoothing and
//naturalize(three layers of dirt on top, rock below). - FAWE adds an angle mask, for example
/[0d][45d], which lets a pattern touch only blocks on a gentle slope. That is slope painting from the command line.
Axiom
- Heightmap tools (Elevation, which can read a heightmap image, and Slope), plus Smooth, Distort and Roughen.
- Painters, including a Noise Painter and a Gradient Painter, with a live preview before anything changes.
- A visual editor, so you judge the shape by eye. Free for non-commercial use, with licence terms on servers.
These commands soften terrain without touching your buildings, because the mask limits them to natural blocks:
For the choice between the two tools, read Axiom vs WorldEdit. All of them share one limit: they edit terrain that already exists. The generator below starts from nothing.
The BlockLab terrain generator
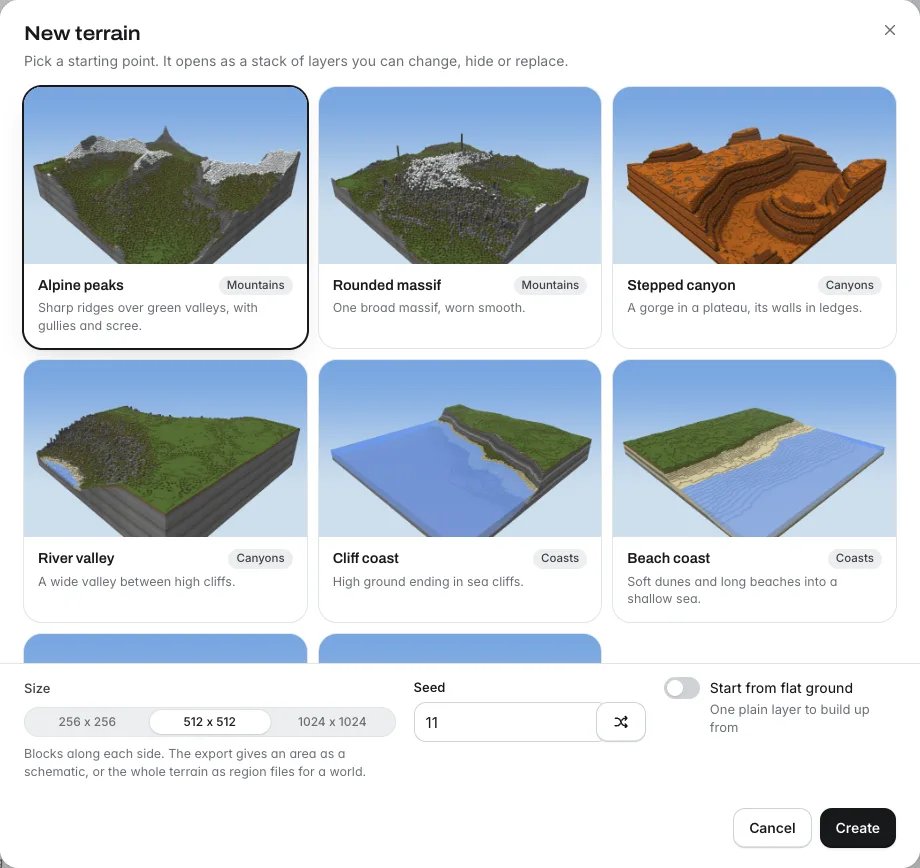
The terrain generator runs in the browser. It works in the order this guide describes: shape, erode, paint, then export. You start from one of eight presets (Alpine peaks, Rounded massif, Stepped canyon, River valley, Cliff coast, Beach coast, Rolling hills, Mesa and buttes) at 256, 512 or 1024 blocks a side, or from flat ground.
- Shape layers (Mountains, Hills, Canyon and others) build the landform, and each layer has a blend mode: Replace, Add, Subtract, Max or Min. A mask limits where a layer applies.
- Erosion layers. Slope erosion settles the slopes. Water erosion runs rain down the slopes: it digs gullies and spreads the sediment in fans, with settings for rain, digging, deposition, run length and gully width.
- The River tool: click a spring and it traces a river down the slopes. Drag the points to bend the course, Shift-click to add one.
- Brushes to hand-edit: Raise, Dig, Smooth, Flatten, Paint, Erode and Mask, plus a Tree tool.
- Paint rules, in a stack where the top rule wins: each has blocks, an optional height range, an optional slope range, a water filter (any, dry land, under water), a slope fade and an edge breakup. Cover sets how much of the area a rule paints. Rock strata adds bands of rock under every rule.
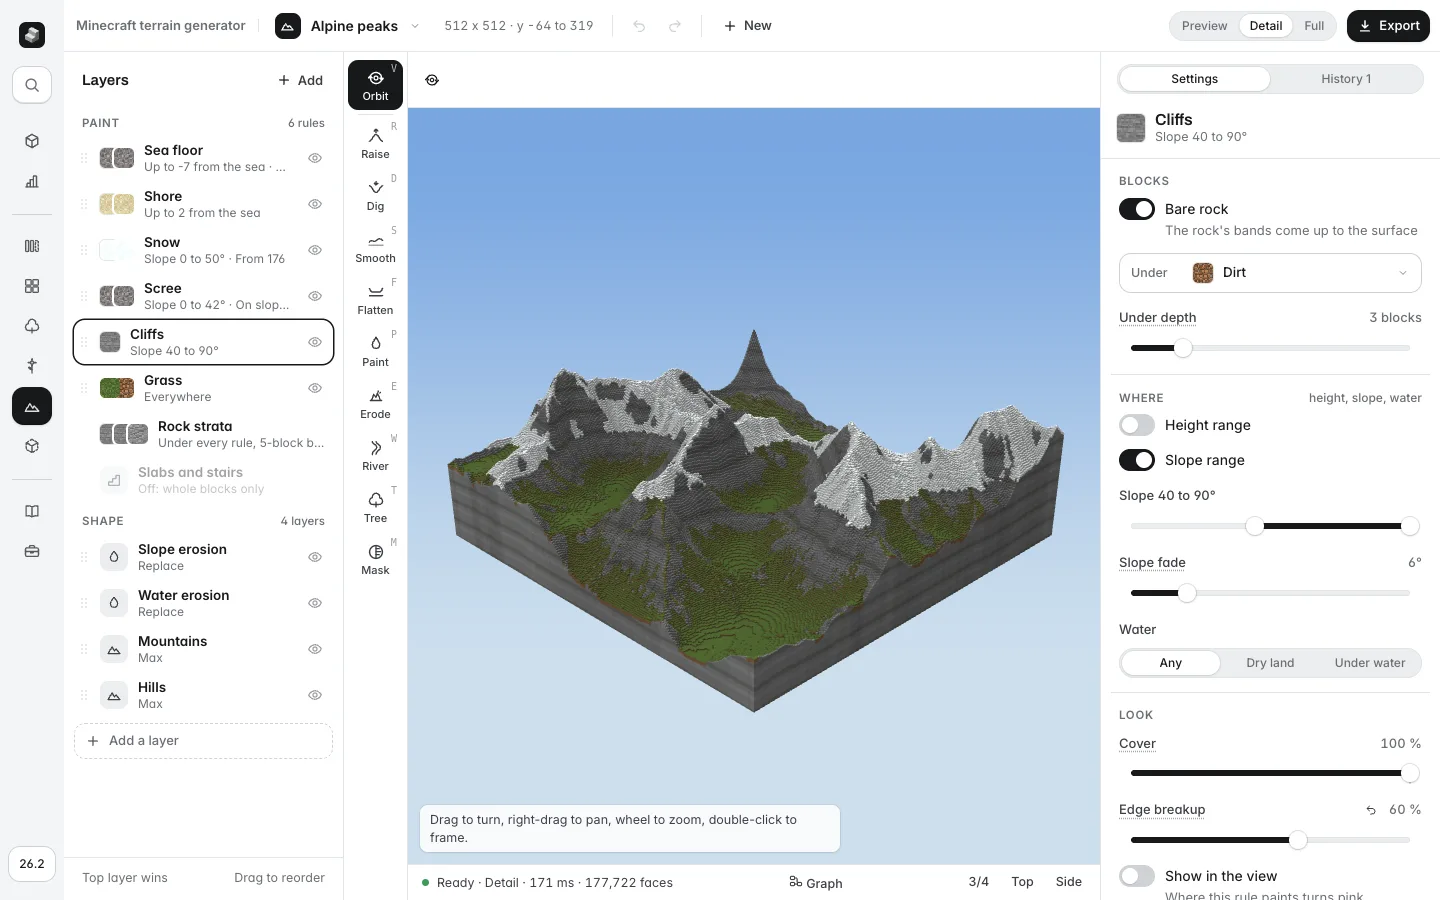
The honest limits: it makes terrain, not buildings, and the 3D view uses the same blocks as the export but is not a replacement for walking the result in game. Expect to finish a build site by hand, with the brushes above. A seed gives you the same layers grown from other noise, so you can try several landscapes from one setup.
Bring it into your world
The Export button gives you three things, each as a tab.
- Area (.schem): the whole terrain or a box you draw, as a schematic. You choose hollow ground (a shell a few blocks deep, far fewer blocks and a faster paste) or solid rock, slabs and stairs (the default smoothing), and whether to include water. The dialog prints
//schem loadand//paste -awith the file name filled in. - Whole map (.mca): the whole terrain as region files, solid to bedrock. Close the world and keep a copy, unzip into the world's folder so the files land in its overworld region folder (
dimensions/minecraft/overworld/region/from 26.1,region/from 1.18 to 1.21; the dialog names the right one for your version), over the chunks there, then open it and go to/tp 0 ~ 0. The game lights the chunks as they load. A 512 by 512 map is one region file of 1024 chunks. - Heightmap (.png): the ground's heights as a 16-bit greyscale image (black is y -64, white is y 319), with no blocks, water or trees, for other terrain tools. Check the bit depth the other tool expects before you rely on it.
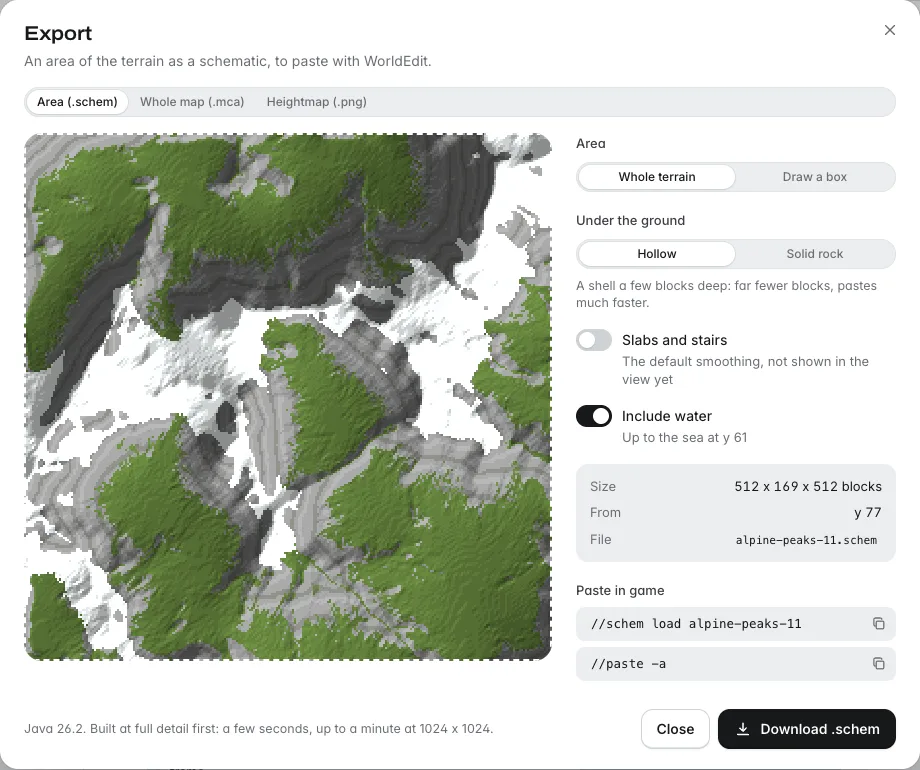
The schematic is tagged with the game version chosen in the Server version menu. The step you will use most is the paste, and it has its own guide: how to import and paste a schematic, with the folders, the commands and the limits for WorldEdit, FastAsyncWorldEdit, Axiom and Litematica. A 512 by 512 paste is large, so run it on a copy of the world first, and read the part of that guide about size limits.
Common mistakes
- Painting before shaping. Colour does not fix a weak landform. Settle the shape from far away first.
- One scale for everything. Hills, mountains and gullies need different sizes. A world of 20-block bumps looks like foam.
- Hard bands of block. Grass, then a line of stone, then a line of snow. Use mixes, patches and soft edges.
- A river on a hillside. It needs a valley, a lower bed than its banks and steps where the ground drops.
- Pasting into a live world with no backup. Region files replace the chunks they cover. Keep a copy.
Where to go next
Fill the land with life: custom trees from the tree generator sit well on a new hillside. Then use the paste guide for every schematic you make.